Qlik NPrinting reports can be run ‘On-Demand’ directly from your Qlik Sense applications, giving you the ability to generate PDF, Excel, Word and Power Point reports directly from within a Qlik Sense application based on your selections and templates.
This functionality now opens up your Qlik deployment to a wide variety of use cases (particularly operational ones) with no need of work-arounds.
Examples include call centre staff being able to download high quality customer reports on demand and administration staff being able to download pre-populated documents.
This blog investigates the steps you’ll need to take to get the most out of Qlik Sense On-Demand reporting.
Qlik NPrinting On-Demand setup
1.
Ensure you have the correct versions setup in your Qlik environment
- Qlik NPrinting Server (June 2017 or later)
- Qlik Sense (February 2019 or later)
2.
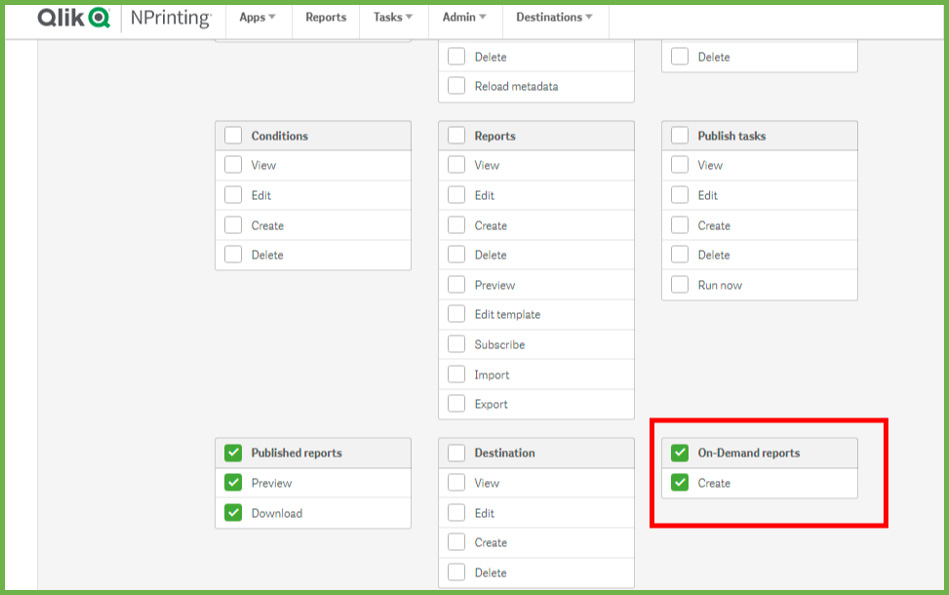
To use the extension, within the NPrinting Management Console you need to add all users that will be using the extension in Qlik NPrinting, with a security role that supports running On-Demand reports.
3.
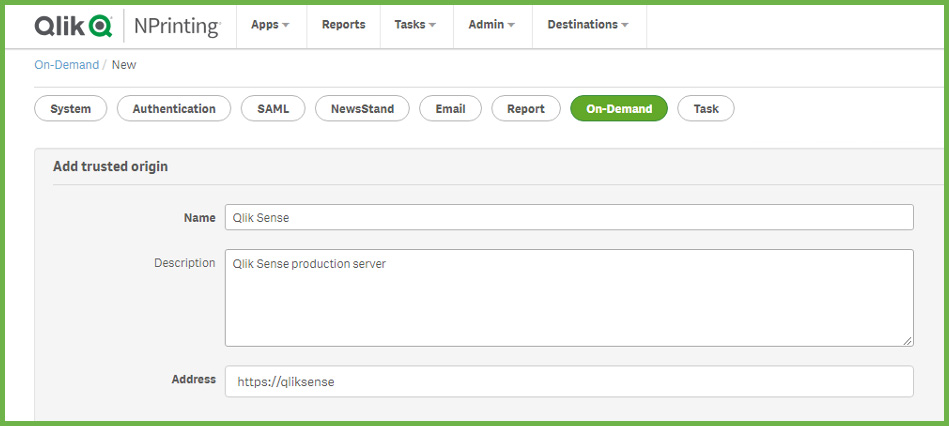
Add your Qlik Sense server as a trusted origin within NPrinting
4.
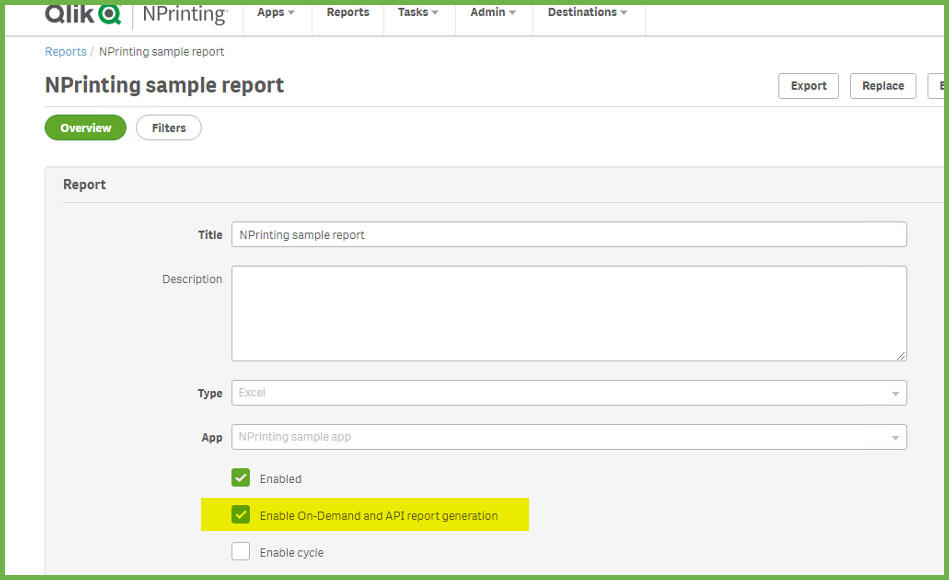
Reports that you would like to enable to run On-Demand, must have the ‘Enable On-Demand and API report generation’ box checked in the NPrinting report configuration
Qlik Sense Application On-Demand setup
The On-Demand report extension is a button that can be added to your Qlik Sense application. It is now included in the Qlik dashboard bundle and supported by Qlik.
To create an On-Demand reporting button in your Qlik app:
1.
Drag the On-Demand reporting button onto your sheet. The button can be found in Custom objects > Qlik Dashboard Bundle
2.
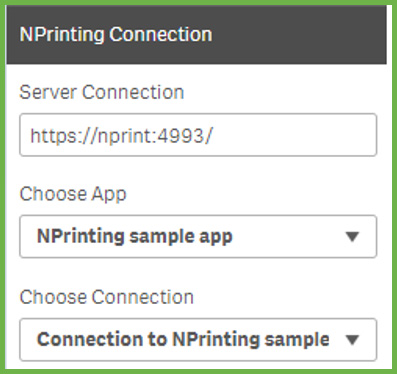
Enter the NPrinting server URL into the server connection, and select the ‘nPrinting app’ and ‘NPrinting connection’ that you would like to use
3.
Select the NPrinting report and set the default export format from the report configuration section. Ensure the prerequisites outlined in the ‘Qlik NPrinting setup’ section above are met.
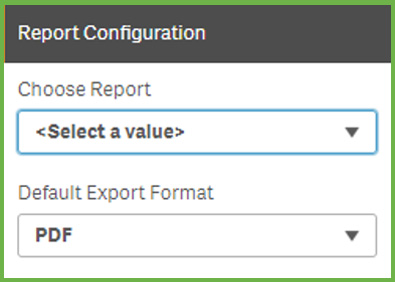
Your report is now ready be run on-demand.
Make a selection in your Qlik App and then click the button from within your Qlik Sense application. The generated report should be filtered based on your selections (please note point one below).
Other important points to note:
- If you make selections on a field in the Qlik Sense app, the same field needs to be included in the Qlik NPrinting report template, or the report will fail. If you do not need the field to be represented in a chart or table, then including current selections in an intro, appendix, or footer would satisfy this, and allow report viewers to see what subset of data was used in the report.
- We recommend that you add run conditions to the NPrinting report to prevent users running large reports without making selections in the application. You could also use the On-Demand button in combination with the Show/Hide container so that the button doesn’t display unless the data set has been filtered to an acceptable number of rows.
- On-Demand is compatible with Chrome, Firefox and Internet Explorer and can only be used with Windows authentication.
Hopefully you will find this guide useful in unlocking the potential of NPrinting On-Demand. If you would like more information, then please contact the Qlik experts at AcumenBI.
Helen Blewett is one of AcumenBI’s specialists in all things Qlik and can help you get the most out NPrinting along with other Qlik applications. If you have questions or would like to discuss this blog then please feel free to contact Helen via email – helenb@acumenbi.co.nz